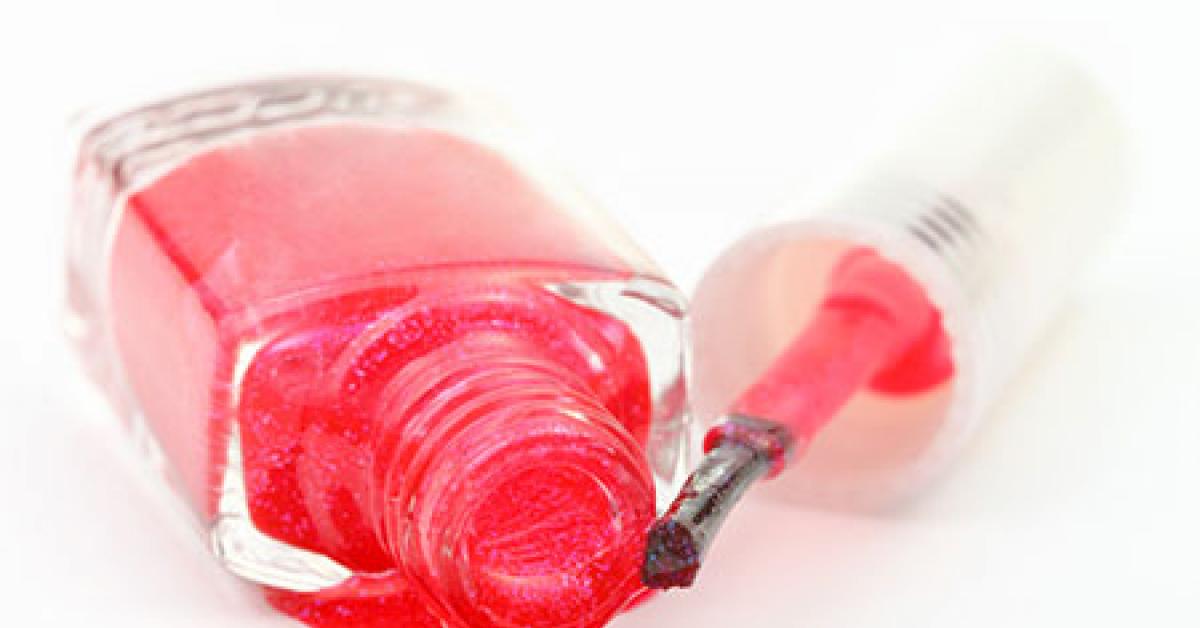

CONCORD, N.C. — Bright, glossy, red nail polish on white linen slacks.
Flat, dull, white interior latex paint on a navy cashmere sport coat.
Such is the life of a cleaner/spotter.
When the nail polish and paint make their way to a fabric surface, they achieve the same result, only in an undesirable area. This is where the cleaner/spotter finds the challenge: how to remove the hard surface and the pigment without distorting the garment’s color or its surface texture.
Always begin removal of nail polish by pre-spotting on the dry side. Use a general pre-spotter to lightly cover the stained area, then apply your POG.
The general pre-spotter will hold the broken-down stain in suspension until it can be flushed away. Use the most aggressive mechanical action you feel comfortable with, taking into consideration the dye, the fiber and the construction.
I usually tamp the stain about six times over the solid portion of the spotting board, then use a bone to work the POG into and through the nail polish. Never use the point of the bone. The bone is at an angle to provide a smooth surface to the fabric while being held at an angle in your hand.
You will begin to see the stain break up, with pigment “floating” on top of the general spotter used in the first step. When you observe the nail polish breaking down, avoid the impulse to rub harder or “dig” at the stain. Get into the habit of decreasing the pressure of your mechanical action, while applying a small amount of general spotter to flush the stain.
Overly aggressive mechanical action during stain removal is the second leading cause of drycleaning claims behind redeposition. Both can be easily prevented.
There will come a time when you will observe little or no additional breakdown of the stain at the spotting board, with just the POG. At this point, add a few drops of amyl acetate to the area.
Amyl acetate will function as a co-solvent and in most cases break the stain down further. This is especially true when it comes to acrylic nail polish.
Your first consideration is the carrier of the pigment. The more carrier removed during dry-side pre-spotting, the better your chances of removing all the pigment if post-spotting becomes necessary.
I feel that I must address the subject of acetone. Acetone is an extremely harsh chemical, but can be effective on nail polish and paint, under limited conditions.
Acetate fabric is a wonderful and cost-effective material used as a lining in a majority of garments. Unfortunately, acetone will melt acetate on contact. No warning (this is your warning). Bang! You have a hole and a valid claim!
Two or even three applications of POG and amyl acetate are much better for the garment than a single drop of acetone; I do not keep acetone in the building.
If the rare situation arises that I want acetone, I go to the drug store and buy a small bottle of nail polish remover that contains acetone. I do this only after I spend the time to verify that there is no risk of the acetone coming into contact with any acetate fabric.
You are now ready to dry-clean your garment, as usual. If the stain has become a glob of messy pigment after being softened by your chemical tools, placing the garment in a cotton pillowcase for cleaning is an option.
In the case of expected streaks and swales, you will need to have the garment “piggyback” on a successive run without the pillowcase to even out the surface of the garment. This is much better than dealing with contact stain transfer in the wheel or running a single item by itself.
If there is a remnant of the original stain, repeating the application of POG, amyl acetate and light mechanical action, followed by dry cleaning, will finish the stain removal process.
On those rare occasions when pigment remains, you will need to post-spot.
If you have followed the protocol as described, you have used two specialized chemical tools, applied mechanical action and dry-cleaned the garment twice. Any hint of a stain will be best treated as water-soluble, since you have already used the options for both chemically soluble and solvent-soluble stains.
Do not underestimate the value of neutral synthetic detergent (NSD). Place the remaining stain over the vacuum nose of the spotting board, apply NSD, then flush the area with steam.
The willingness to do spot-bleaching is a way to set yourself apart in the marketplace and in the industry. The mere mention of using a bleach sends some cleaner/spotters into a panic. It does not have to be that way.
You can get 3% hydrogen peroxide at the drug store, and 10%, 20% and 30% hydrogen peroxide can be purchased from a store that sells to hair care professionals. Your supply distributor should have access to small, granular, activated sodium perborate that works well at the spotting board.
Having the option of four progressive strengths of hydrogen peroxide is a way to gradually increase the bleaching action on the remnants of the stain.
Place the stained area over the vacuum nose of the board and flush with steam. Move the stain over the solid portion of the board and apply your choice of bleach. If you use peroxide, allow it to work slowly; do not heat the area.
The greatest control in spot-bleaching is achieved by applying progressively strong concentrations of hydrogen peroxide and waiting for results. There is no need to flush between applications.
Sodium perborate must be heated with a wisp of steam to melt the granules through the stain. Both peroxide and perborate should be neutralized with acetic acid after the last traces of the stain are gone.
Your most valuable tools in stain removal are confidence and patience.
To read Part One, click HERE.
Have a question or comment? E-mail our editor Dave Davis at [email protected].